5" Sensor

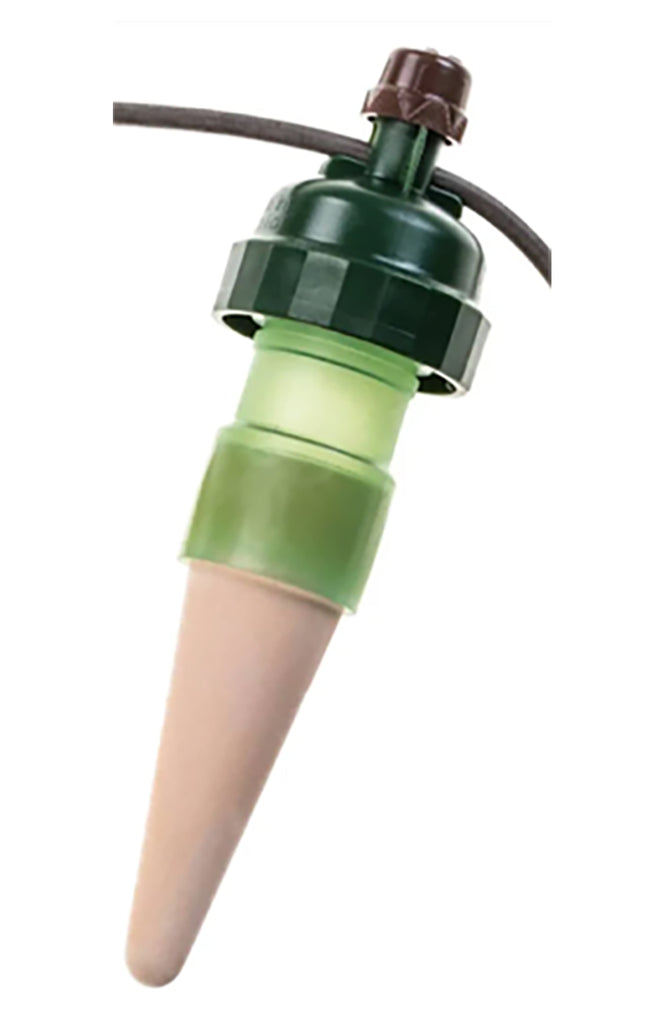
Tropf Blumat 5" Sensor - 1 Individual Sensor Bulk
The Tropf-Blumat (Tropf means drip in German) is a sensor that automatically supplies plants water through its thin tubing. This ceramic cone employs the principle of hydrostatic pressure, that delivers water extremely slowly, and at the plant’s own preferred rate. Allowing each plant to determine its own irrigation schedule. Blumat Sensors can be used as standalone devices or can also be integrated with drip emitters (we call them “distribution drippers”), drip tape (BluSoak), or capillary mats. These three components assist Blumat sensors in going further. While a Blumat typically irrigates a very small area (a 1-gallon container for example), a single Blumat can irrigate entire garden beds when attached to the Blusoak. How It Works Each Tropf Blumat is filled with water and voided of air prior to being connected to a pressurized line (pressure from gravity-feed is adequate). The water inside the Blumat is in a completely sealed environment. The only exposure it has is through the pores in the ceramic cone. As soil surrounding the cone dries It pulls on the moisture inside the cone through osmotic pressure. Since this is a sealed environment and the pressure cannot equalize, this pulls on a plastic diaphragm in the top of the Blumat. When the diaphragm is pulled down, it allows an irrigation tube running through the top of the valve of the Blumat to open and emit moisture. It does this very gradually. As the water is emitted through the Blumat, the moisture is gradually restored to the soil surrounding the porous ceramic. This relieves the pressure difference between the chamber inside the Blumat and the surrounding soil. This stops pulling on the diaphragm, and the diaphragm restores its former position of pinching the irrigation tubing shut. Allowing each plant to determine its own watering schedule. *The brown knob on top of each Tropf Blumat can be individually calibrated to specific plant species, strain/cultivar/varietal, or media. Details Materials Clay Silicone Plastic Dimensions Weight: 1.3oz Total length: 5.2" Max soil depth: 4" Cap width: 1.4" Sensor width: 1" Tubing length: 8" Connectors Fits 8mm Blumat and Superflex tubing. Flow Rate Adjustable Stand Alone Product? No. Requires water source. Instructions Tropf Blumat Instructions Water your garden thoroughly (ideally overnight) before installation. Prep the Carrots: Fill a container with cooled, non-aerated water (if you’re not sure, boil & cool the water first). Separate the ceramic bottoms from the plastic tops, and soak both parts for at least 15 minutes. While holding the green top underwater use a pipette/eyedropper or your thumb to squirt water into the holes in the green cap. You want to displace any small air bubbles stuck in the cap. Hold both cap and ceramic bottom underwater. Confirm the ceramic bottom and cap are both completely void of air, and reassemble the Blumat ceramic bottom with the green cap while both components are still underwater. Soak the assembled Blumat sensors and keep them submerged for a minimum of 15 minutes. Blumat sensors can stay in water indefinitely, but avoid algae growth and light exposure. While the Tropf Blumats are soaking: Connect the 8mm tubing to a reservoir or Blumat Pressure Reducer which has been integrated to a pressurized line. Run the 8mm tubing to your plants. Installation: Water the garden again, and push the Blumat Carrot in where you would like the moisture sensed, ensuring the ceramic cone is completely covered and firmly anchored. Cut the 8mm tubing and insert the 8 x 8 x 3mm tee (included with each Blumat). Slide the 8mm tubing over the 8mm barbs on the tee. For the last carrot, use the elbow insert instead of the tee. Alternatively, keep the tee in place. Use a small amount of 8mm tubing to attach a 8mm shut-off valve following your final Blumat carrot. This will function as an air/debris purge valve. Adjustment: Turn on the water supply and adjust the flow to each Blumat. Open the valve on the Blumat until flow is visible. Keeping the 3mm tubing level with the valve of the Blumat, slowly tighten (turn clockwise) the Blumat until a hanging drop is just achieved. The flow should just be stopped, but do not twist beyond that point for the “hanging drop.” Tighten the valve on the Blumat an additional two triangles. This will roughly calibrate the sensor to keep maintain current moisture levels.* *If using BluSoak drip tape, do not follow this step. Keeping your sensors at the hanging drip is ideal. Monitor: Come back in 12-24 hours, and make adjustments to each Blumat. If a container or area is over-watered, tighten the Blumat valve (turn clockwise). If a container or area is under-watered, open the Blumat valve (turn counter-clockwise). Repeat the previous step until your system is exactly where you’d like it. The Blumat Digital Moisture Meter is a great tool for assisting with this step. Comparison Chart Tropf Blumat Blumat Classic Glass Globe Blumat Bottle Adapter Vacation Ready ✓ ✓ ✓ ✓ Adjustable ✓ ✓ Out-of-Box Ready ✓ ✓ ✓ Custom System Integration ✓ Max. Water Delivery p/ 24 hrs Adjustable/Unlimited 200ml 118ml 200ml Ideal Location to Water Raised Bed/Garden/Potted Plants Houseplant Houseplant Houseplant Additional Info Maintenance Guide to Tropf Blumat Sensors | Irrigation Equipment Blumat Troubleshooting & Operating Tips/Tricks | Irrigation Equipment Video
$9.18

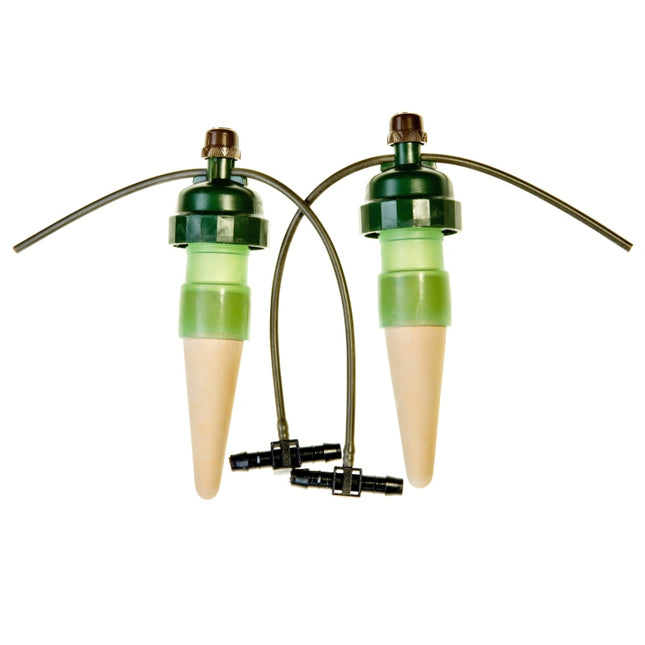
Tropf Blumat 5" Sensor - Set of 2
The Tropf-Blumat (Tropf means drip in German) is a sensor that automatically supplies plants water through its thin tubing. This ceramic cone employs the principle of hydrostatic pressure, that delivers water extremely slowly, and at the plant’s own preferred rate. Allowing each plant to determine its own irrigation schedule. Blumat Sensors can be used as standalone devices or can also be integrated with drip emitters (we call them “distribution drippers”), drip tape (BluSoak), or capillary mats. These three components assist Blumat sensors in going further. While a Blumat typically irrigates a very small area (a 1-gallon container for example), a single Blumat can irrigate entire garden beds when attached to the Blusoak. How It Works Each Tropf Blumat is filled with water and voided of air prior to being connected to a pressurized line (pressure from gravity-feed is adequate). The water inside the Blumat is in a completely sealed environment. The only exposure it has is through the pores in the ceramic cone. As soil surrounding the cone dries It pulls on the moisture inside the cone through osmotic pressure. Since this is a sealed environment and the pressure cannot equalize, this pulls on a plastic diaphragm in the top of the Blumat. When the diaphragm is pulled down, it allows an irrigation tube running through the top of the valve of the Blumat to open and emit moisture. It does this very gradually. As the water is emitted through the Blumat, the moisture is gradually restored to the soil surrounding the porous ceramic. This relieves the pressure difference between the chamber inside the Blumat and the surrounding soil. This stops pulling on the diaphragm, and the diaphragm restores its former position of pinching the irrigation tubing shut. Allowing each plant to determine its own watering schedule. *The brown knob on top of each Tropf Blumat can be individually calibrated to specific plant species, strain/cultivar/varietal, or media. Details Materials Clay Silicone Plastic Dimensions Weight: 1.3oz Total length: 5.2" Max soil depth: 4" Cap width: 1.4" Sensor width: 1" Tubing length: 8" Connectors Fits 8mm Blumat and Superflex tubing. Flow Rate Adjustable Stand Alone Product? No. Requires water source. Instructions Tropf Blumat Instructions Water your garden thoroughly (ideally overnight) before installation. Prep the Carrots: Fill a container with cooled, non-aerated water (if you’re not sure, boil & cool the water first). Separate the ceramic bottoms from the plastic tops, and soak both parts for at least 15 minutes. While holding the green top underwater use a pipette/eyedropper or your thumb to squirt water into the holes in the green cap. You want to displace any small air bubbles stuck in the cap. Hold both cap and ceramic bottom underwater. Confirm the ceramic bottom and cap are both completely void of air, and reassemble the Blumat ceramic bottom with the green cap while both components are still underwater. Soak the assembled Blumat sensors and keep them submerged for a minimum of 15 minutes. Blumat sensors can stay in water indefinitely, but avoid algae growth and light exposure. While the Tropf Blumats are soaking: Connect the 8mm tubing to a reservoir or Blumat Pressure Reducer which has been integrated to a pressurized line. Run the 8mm tubing to your plants. Installation: Water the garden again, and push the Blumat Carrot in where you would like the moisture sensed, ensuring the ceramic cone is completely covered and firmly anchored. Cut the 8mm tubing and insert the 8 x 8 x 3mm tee (included with each Blumat). Slide the 8mm tubing over the 8mm barbs on the tee. For the last carrot, use the elbow insert instead of the tee. Alternatively, keep the tee in place. Use a small amount of 8mm tubing to attach a 8mm shut-off valve following your final Blumat carrot. This will function as an air/debris purge valve. Adjustment: Turn on the water supply and adjust the flow to each Blumat. Open the valve on the Blumat until flow is visible. Keeping the 3mm tubing level with the valve of the Blumat, slowly tighten (turn clockwise) the Blumat until a hanging drop is just achieved. The flow should just be stopped, but do not twist beyond that point for the “hanging drop.” Tighten the valve on the Blumat an additional two triangles. This will roughly calibrate the sensor to keep maintain current moisture levels.* *If using BluSoak drip tape, do not follow this step. Keeping your sensors at the hanging drip is ideal. Monitor: Come back in 12-24 hours, and make adjustments to each Blumat. If a container or area is over-watered, tighten the Blumat valve (turn clockwise). If a container or area is under-watered, open the Blumat valve (turn counter-clockwise). Repeat the previous step until your system is exactly where you’d like it. The Blumat Digital Moisture Meter is a great tool for assisting with this step. Comparison Chart Tropf Blumat Blumat Classic Glass Globe Blumat Bottle Adapter Vacation Ready ✓ ✓ ✓ ✓ Adjustable ✓ ✓ Out-of-Box Ready ✓ ✓ ✓ Custom System Integration ✓ Max. Water Delivery p/ 24 hrs Adjustable/Unlimited 200ml 118ml 200ml Ideal Location to Water Raised Bed/Garden/Potted Plants Houseplant Houseplant Houseplant Additional Info Maintenance Guide to Tropf Blumat Sensors | Irrigation Equipment Blumat Troubleshooting & Operating Tips/Tricks | Irrigation Equipment Video
$17.92

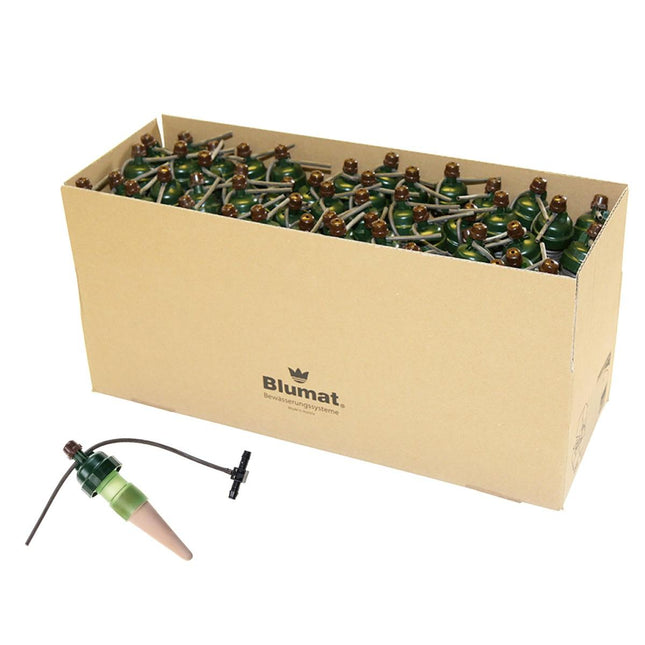
Tropf Blumat 5" Sensor - Case of 50
The Tropf-Blumat (Tropf means drip in German) is a sensor that automatically supplies plants water through its thin tubing. This ceramic cone employs the principle of hydrostatic pressure, that delivers water extremely slowly, and at the plant’s own preferred rate. Allowing each plant to determine its own irrigation schedule. Blumat Sensors can be used as standalone devices or can also be integrated with drip emitters (we call them “distribution drippers”), drip tape (BluSoak), or capillary mats. These three components assist Blumat sensors in going further. While a Blumat typically irrigates a very small area (a 1-gallon container for example), a single Blumat can irrigate entire garden beds when attached to the Blusoak. How It Works Each Tropf Blumat is filled with water and voided of air prior to being connected to a pressurized line (pressure from gravity-feed is adequate). The water inside the Blumat is in a completely sealed environment. The only exposure it has is through the pores in the ceramic cone. As soil surrounding the cone dries It pulls on the moisture inside the cone through osmotic pressure. Since this is a sealed environment and the pressure cannot equalize, this pulls on a plastic diaphragm in the top of the Blumat. When the diaphragm is pulled down, it allows an irrigation tube running through the top of the valve of the Blumat to open and emit moisture. It does this very gradually. As the water is emitted through the Blumat, the moisture is gradually restored to the soil surrounding the porous ceramic. This relieves the pressure difference between the chamber inside the Blumat and the surrounding soil. This stops pulling on the diaphragm, and the diaphragm restores its former position of pinching the irrigation tubing shut. Allowing each plant to determine its own watering schedule. *The brown knob on top of each Tropf Blumat can be individually calibrated to specific plant species, strain/cultivar/varietal, or media. Details Materials Clay Silicone Plastic Dimensions Weight: 1.3oz Total length: 5.2" Max soil depth: 4" Cap width: 1.4" Sensor width: 1" Tubing length: 8" Connectors Fits 8mm Blumat and Superflex tubing. Flow Rate Adjustable Stand Alone Product? No. Requires water source. Instructions Tropf Blumat Instructions Water your garden thoroughly (ideally overnight) before installation. Prep the Carrots: Fill a container with cooled, non-aerated water (if you’re not sure, boil & cool the water first). Separate the ceramic bottoms from the plastic tops, and soak both parts for at least 15 minutes. While holding the green top underwater use a pipette/eyedropper or your thumb to squirt water into the holes in the green cap. You want to displace any small air bubbles stuck in the cap. Hold both cap and ceramic bottom underwater. Confirm the ceramic bottom and cap are both completely void of air, and reassemble the Blumat ceramic bottom with the green cap while both components are still underwater. Soak the assembled Blumat sensors and keep them submerged for a minimum of 15 minutes. Blumat sensors can stay in water indefinitely, but avoid algae growth and light exposure. While the Tropf Blumats are soaking: Connect the 8mm tubing to a reservoir or Blumat Pressure Reducer which has been integrated to a pressurized line. Run the 8mm tubing to your plants. Installation: Water the garden again, and push the Blumat Carrot in where you would like the moisture sensed, ensuring the ceramic cone is completely covered and firmly anchored. Cut the 8mm tubing and insert the 8 x 8 x 3mm tee (included with each Blumat). Slide the 8mm tubing over the 8mm barbs on the tee. For the last carrot, use the elbow insert instead of the tee. Alternatively, keep the tee in place. Use a small amount of 8mm tubing to attach a 8mm shut-off valve following your final Blumat carrot. This will function as an air/debris purge valve. Adjustment: Turn on the water supply and adjust the flow to each Blumat. Open the valve on the Blumat until flow is visible. Keeping the 3mm tubing level with the valve of the Blumat, slowly tighten (turn clockwise) the Blumat until a hanging drop is just achieved. The flow should just be stopped, but do not twist beyond that point for the “hanging drop.” Tighten the valve on the Blumat an additional two triangles. This will roughly calibrate the sensor to keep maintain current moisture levels.* *If using BluSoak drip tape, do not follow this step. Keeping your sensors at the hanging drip is ideal. Monitor: Come back in 12-24 hours, and make adjustments to each Blumat. If a container or area is over-watered, tighten the Blumat valve (turn clockwise). If a container or area is under-watered, open the Blumat valve (turn counter-clockwise). Repeat the previous step until your system is exactly where you’d like it. The Blumat Digital Moisture Meter is a great tool for assisting with this step. Comparison Chart Tropf Blumat Blumat Classic Glass Globe Blumat Bottle Adapter Vacation Ready ✓ ✓ ✓ ✓ Adjustable ✓ ✓ Out-of-Box Ready ✓ ✓ ✓ Custom System Integration ✓ Max. Water Delivery p/ 24 hrs Adjustable/Unlimited 200ml 118ml 200ml Ideal Location to Water Raised Bed/Garden/Potted Plants Houseplant Houseplant Houseplant Additional Info Maintenance Guide to Tropf Blumat Sensors | Irrigation Equipment Blumat Troubleshooting & Operating Tips/Tricks | Irrigation Equipment Video
$444.93


